How to Use a Car Jump Starter, Step by Step
To use a car jump starter, turn off the car, connect the red clamp to the positive point and the black clamp to the approved ground point, then start the engine as the manuals direct. Choose a unit that fits your vehicle and follow its instructions.
On this page (9 sections)
- How do you use a car jump starter step by step?
- Where should the black clamp go?
- How do you choose a car jump starter?
- What should you check before connecting the clamps?
- What common mistakes should you avoid?
- What if the car doesn't start?
- How long should the jump starter stay connected?
- How do you disconnect and store the unit?
- How to use a car jump starter safely: what's the decision?
To use a car jump starter safely, connect the red clamp to the battery's positive terminal and the black clamp to the vehicle's approved ground point, then follow the unit's starting instructions. Choose a model suited to your vehicle, and let the vehicle and jump starter manuals settle the exact connection and start sequence.
A portable jump starter uses its own battery to supply power to a vehicle's 12V battery, so you don't need another car. If you need the basics before choosing one, see what a jump starter is and whether you need one.
How do you use a car jump starter step by step?
Park safely, connect the clamps in the order your manuals specify, start the car, and disconnect as directed. Don't guess at a connection point or use a jump starter that doesn't match your vehicle.
- Move the car away from traffic if you can do so safely. Put it in Park, or in gear for a manual, apply the parking brake, and switch off the ignition and electrical accessories.
- Check the battery and cables. Stop if the battery is cracked, swollen, leaking, or frozen, or if you see damaged wiring. Check the jump starter manual for other conditions that rule out use.
- Find the positive and negative terminals or the vehicle's designated jump-start points. Look in the owner's manual if you can't identify them clearly.
- Keep the jump starter switched off while connecting. Attach the red clamp to the positive point, then connect the black clamp to the approved negative terminal or ground point as instructed.
- Turn on or activate the jump starter as its manual directs. Start the car using its normal starting procedure, and follow the unit's instructions if the engine doesn't start.
- Once the car starts, switch off or disconnect the jump starter as directed. Remove the clamps in the order specified by the manuals, keeping them apart.
- Put the cables away, close the hood, and recharge the jump starter according to its instructions.
Don't try to jump-start a car if you smell fuel, see smoke, or can't make secure connections. For the alternatives and equipment involved when no second car is available, read how to jump-start a car without another car.
Where should the black clamp go?
Use the grounding point named in your vehicle manual. Depending on the vehicle, this may be a designated jump-start point or an approved unpainted metal point away from the battery.
Don't assume every metal surface is a safe ground. Avoid moving parts, painted or dirty surfaces, fuel lines, and parts your manual identifies as off-limits.
Can you connect both clamps to the battery?
Some instructions may allow that, while others direct you to use a separate ground point. Follow your vehicle and jump starter manuals, and don't use a connection method just because it worked on another car.
If you can't identify the positive terminal or an approved ground point, pause and get help. A wrong connection can damage equipment or create a safety hazard.
How do you choose a car jump starter?
Match the jump starter to your vehicle, your storage space, and the way you'll maintain it. Check its supported engine size and voltage, then weigh portability, status indicators, charging needs, and any extra functions you will actually use.
Engine size is a useful first filter, but it isn't the only one. Check the maker's compatibility guidance for your vehicle and engine type, and keep the unit charged according to its instructions so it is ready when needed.
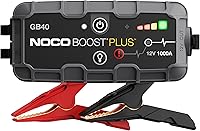
For a compact glove-box choice, the NOCO Boost GB40 supports gas engines up to 6.0L and diesel engines up to 3.0L. Its 2.4 lb weight, spark-proof and reverse-polarity protection, and built-in flashlight suit drivers who value a smaller unit; skip it if your vehicle exceeds those engine limits.
The Hulkman Alpha85 fits drivers who want an on-unit screen to show status, battery level, and possible errors. It supports gas engines up to 8.5L and diesel engines up to 6.0L, but its 4.5 lb weight and more frequent storage charging may not suit someone prioritizing the smallest, least-maintenance option.
For larger supported engines and fast charging, the Gooloo GT4000S supports gas engines up to 12.0L and diesel engines up to 10.0L. It has a status screen and a 100W two-way charging feature, but skip it if you don't need that capacity or won't keep up with its charging guidance.
For a broader comparison of size, output, and features, use what to look for in a jump starter.
What should you check before connecting the clamps?
Confirm that the jump starter suits your vehicle and that the battery looks safe to work around. Check both manuals for compatibility, charging, temperature, and connection instructions before you begin.
Keep the clamps from touching each other or loose metal. If the jump starter has a screen, indicator, or warning light, learn what it means from the manual before an emergency.
A battery that is cracked, leaking, swollen, or frozen needs attention from a qualified professional. Don't use a jump starter to try to overcome visible battery damage.
What common mistakes should you avoid?
Don't improvise the connections, ignore warnings, or repeat failed starting attempts without checking the instructions. These shortcuts can damage the unit or vehicle and make a roadside problem harder to solve.
Common errors include attaching the black clamp to an unapproved point, allowing the clamps to touch, and turning on the jump starter before making the connections. Another is choosing a unit based only on a large peak-output number without checking its stated engine fit.
Don't assume a dead battery is the only reason a car won't start. If the unit shows an error or the car still won't start, stop and use the troubleshooting steps in both manuals rather than changing the clamp positions at random.
What if the car doesn't start?
Stop and follow the jump starter's troubleshooting instructions. Don't keep repeating attempts or change clamp positions without checking both manuals.
A weak or failed start can have more than one cause, including a battery or vehicle problem that a jump starter can't solve. If the unit shows an error, use its manual to identify the next step.
For model-specific troubleshooting, see what to check when a jump starter won't charge or turn on. If you're unsure whether the battery is beyond a jump, read whether a jump starter can start a completely dead battery.
How long should the jump starter stay connected?
Follow the connection time and starting sequence in the unit's manual. Models can differ, so don't rely on one waiting time for every jump starter.
Once the car starts, remove the clamps as directed. For more detail on timing, see how long to leave a jump starter connected.
How do you disconnect and store the unit?
Switch off and remove the clamps in the order your manuals specify, then store and recharge the unit as directed. Keep the clamps from touching each other or metal during removal and storage.
Check the manual for temperature limits and recharge intervals. Hulkman recommends recharging the Alpha85 at least every 3 months, and Gooloo gives the same interval for long-term GT4000S storage.
Charge the unit before its first use if its instructions call for it, and check its charge before a long trip or a season when you expect cold starts. Store it within its stated temperature range, away from prolonged heat, moisture, or direct sunlight.
How to use a car jump starter safely: what's the decision?
Choose a model that fits your engine and that you'll keep charged, then follow its manual every time you connect it. Pick the GB40 for compact storage in a compatible vehicle, the Alpha85 for a helpful status display and broader engine fit, or the GT4000S for larger supported engines and fast charging.
The safest routine is to confirm the connection points, keep the clamps apart, and stop if the battery or cables look damaged. For help choosing before an emergency, start with what to know before buying a car jump starter.
Frequently asked questions
Which clamp goes on first when using a car jump starter?
Usually, connect the red clamp to the positive battery terminal first, then connect the black clamp to the vehicle ground point specified by your manual. Follow the jump starter and vehicle instructions because connection points and steps can vary.
Keep the clamps apart while the unit is on.
How long should a jump starter stay connected?
Use the timing and start sequence in the jump starter manual. Some units indicate when they are ready, while others have different operating steps.
If the car doesn't start, disconnect or pause as the instructions direct instead of making repeated attempts without a break.
Can I use a jump starter on a completely dead battery?
Some jump starters offer a special mode for a battery that is too low for normal operation, but the feature and procedure vary by model. Check your unit's instructions first.
A battery that is damaged, frozen, leaking, or swollen shouldn't be jump-started.
What should I do after the car starts?
Turn off the jump starter if its instructions say to, then remove the clamps in the specified order and keep them from touching each other or metal. Secure the cables, close the hood carefully, and recharge the jump starter as directed so it's ready for another use.